Roofing can be a very profitable business, especially when you get regular leads. Most roofing businesses rely on local marketing, word-of-mouth, and referrals to find new customers. But here’s the thing: not many roofers are using social media or paid ads to grow their businesses. Those who are, especially with Facebook Ads and Google Ads, have seen amazing results.
Now, getting leads through Facebook Ads isn’t about luck. It takes effort and the right strategy. You need to write clear and interesting ad copy, target the right people, and create eye-catching ad designs. But the good news is, if you do it right, you can get high-quality leads for your roofing business.
Today, we’re going to talk about Facebook Ads for Roofers to get leads that actually turn into appointments. Facebook Ads are a powerful tool, and if you use them the right way, they can help your business grow fast. Let’s break it down step by step and see how this can make a big difference for your business in 2025.
Set up a Facebook Ads Account For Your Business.
To start running ads for your business, the first step is to set up a Facebook Ads account, also known as a Meta Ads account. If you already have a Facebook Business Page, an Ads account will automatically be linked to your page.
If you want me or someone else to run ads for you, you’ll need to use Facebook Business Manager. Setting this up can be a bit confusing, but don’t worry—there are plenty of videos online that explain how to set up a Facebook Ads account step by step. Once it’s ready, you’ll be all set to start running ads.
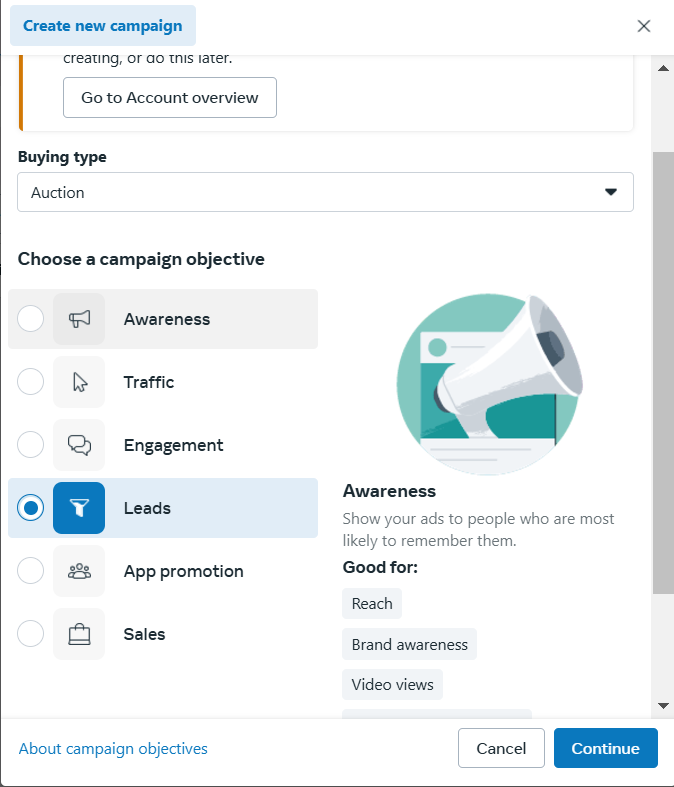
Now that you have your Facebook Ads account, the next step is to open Facebook Business Manager and click on Create New Campaign. You’ll see four options to choose from. Select the Leads option because our goal is to generate leads for your business.
Facebook Ads Campaign Creation For Roofers.
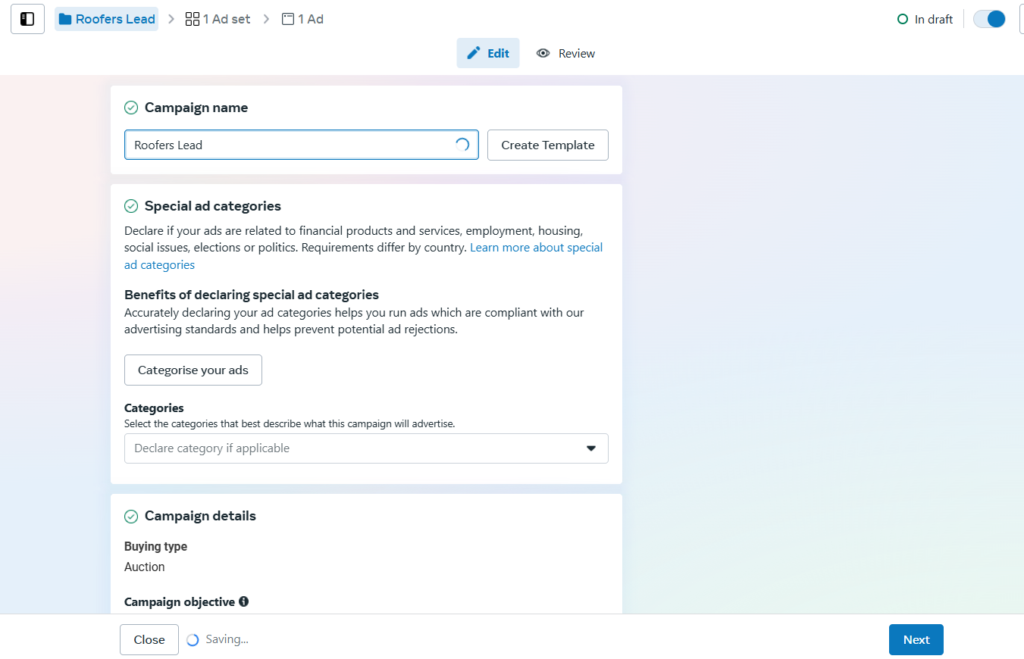
Now, you will see this page on your screen. We won’t be using advanced features of Facebook because, honestly, they’re not very important for a lead generation campaign. Just give your ad campaign any name, and then click Next in the bottom-right corner to move to the next step.
This page is really important because it gives you all the options, like choosing the location and setting the daily budget for your ad campaign. If you’re a roofer and planning to run ads for your business, I recommend a minimum budget of $20–$30 per day for the best results.
The thing is, Facebook’s algorithm is really advanced these days. After your campaign runs for a few days, the algorithm will automatically figure out which types of people are converting into leads. It will then start targeting people who are actually looking for your services. The moral of the story is: that the higher your ad budget, the faster you’ll see results.
But don’t make the mistake of putting your entire $40/day budget into one ad campaign. Instead, create two ad campaigns and split your budget, putting $20/day into each campaign. Run them for 7 days to see which one performs better. Then, you can increase the budget for the campaign that’s doing well.
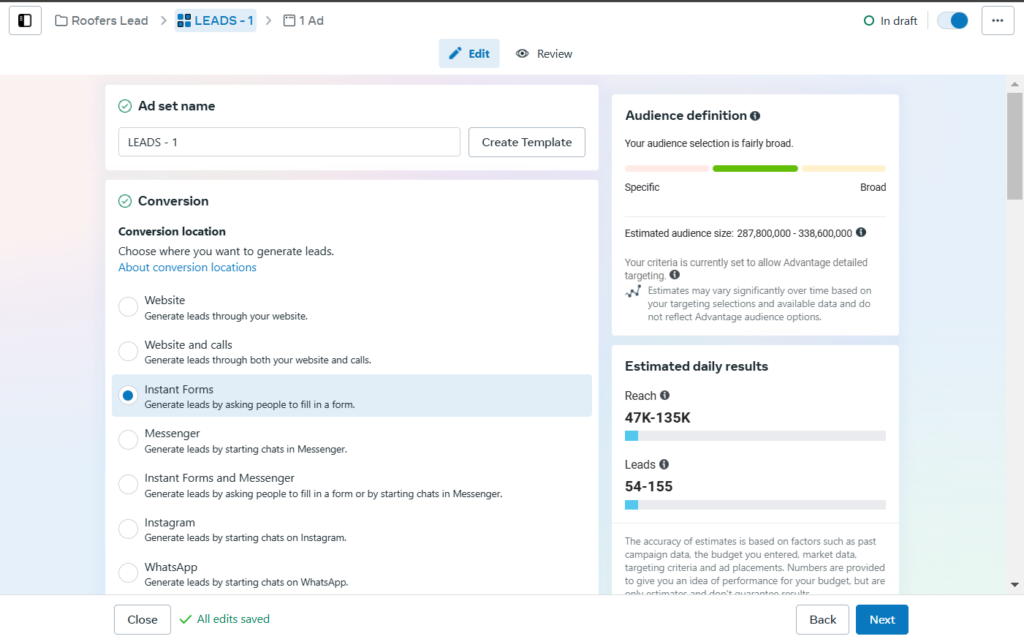
As you can see in the image above, on the second page, the first thing you need to do is select where your leads will be redirected. Let me explain in simple terms: once your ad is live, people will start seeing it. If someone is interested in your services, they’ll click on your ad and be redirected to the space you choose.
That person will click the “Learn More” button and be redirected to either a landing page or a Facebook form. There, they will fill in their information, like their name, phone number, email, address, and project details. You can also customize the questions however you want.
If you already have a landing page to collect customer data, that’s great! But if you don’t, there’s no need to worry. You can choose Instant Forms instead. Facebook Ads Manager has this feature built-in, so you can easily create Instant Forms.
The benefit of using a landing page is that you’ll get higher-quality leads who are more likely to convert into customers. However, the difference isn’t huge, so using Instant Forms is a good option if you don’t have a landing page.
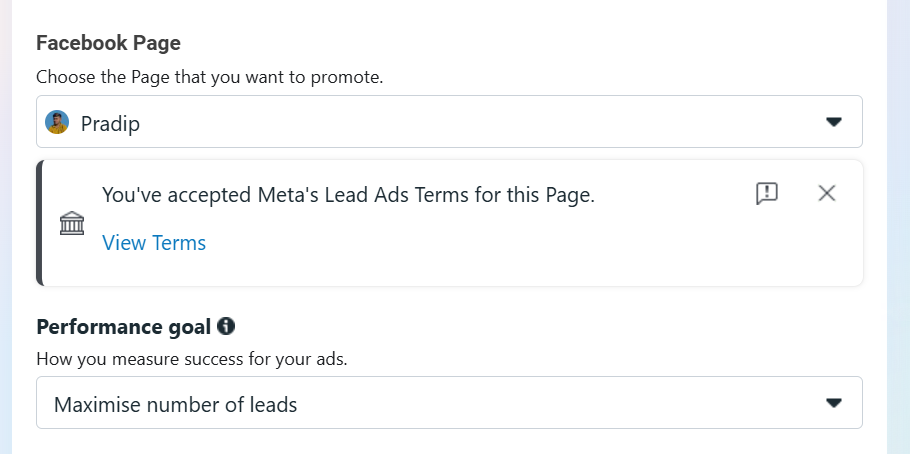
After you choose Instant Form or a landing page, the next step is to select a Facebook page. If you’re running the ads yourself, just pick your page from the list. But if an agency or freelancer is running your ads, you’ll need to give them access. You can do this in Facebook Manager settings.
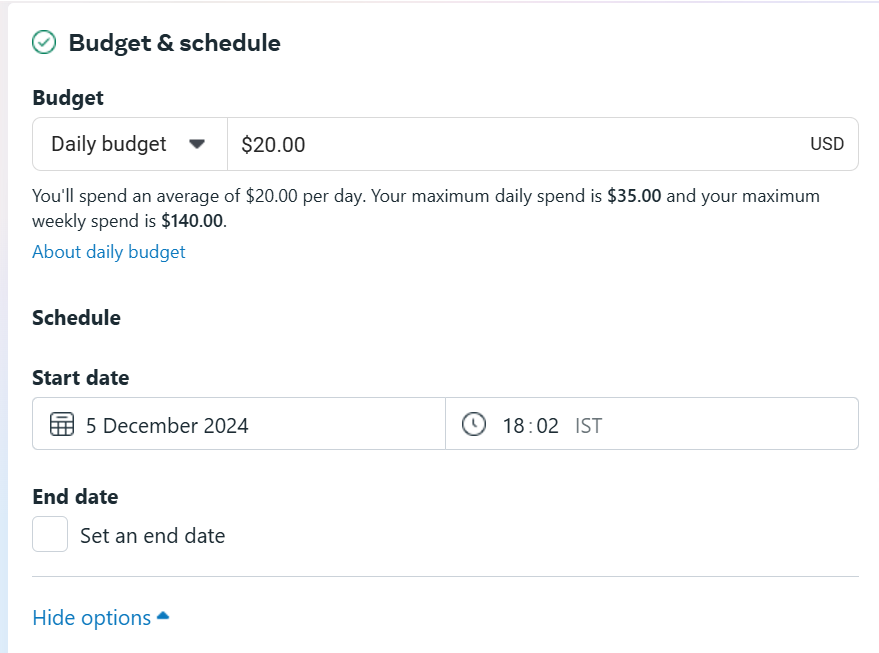
There are other options, but honestly, they’re not that important for a lead generation ad campaign, especially when you’re just starting out. So, scroll down to the Budget & Schedule section, where you can set the daily budget for your ad campaign.
Everyone has a different budget, so choose an amount you’re comfortable spending daily. But remember, don’t put your entire budget into one campaign. Instead, create 2–3 campaigns and split your budget for better results.
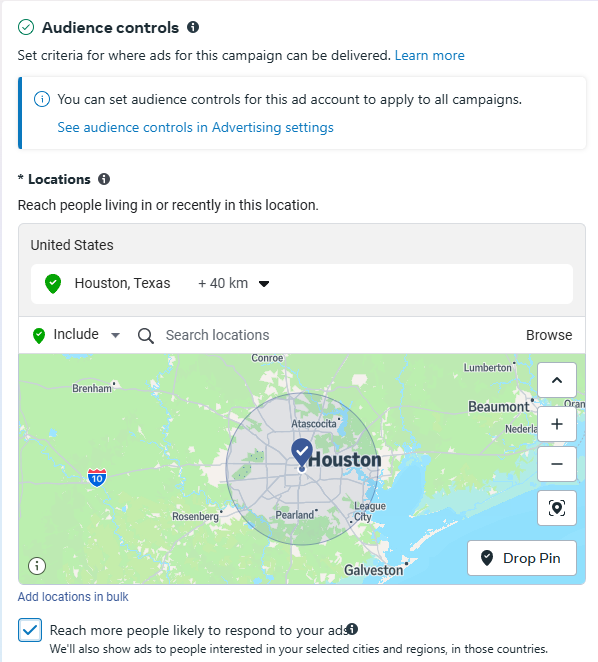
Now we come to the most interesting and important part—choosing the location where you want to show your ads. Obviously, most people want leads from nearby areas, like within a 20–30 mile radius. If your business has multiple branches in different locations, you can add all those locations in the Ad Manager.
For example, I’ve added Houston as the location in the Ad Manager. This means Facebook will only show my ads in that area, and I’ll get leads from there.
After selecting the location, you’ll see the Advantage+ Audience option. This allows you to target specific people based on their interests, like homeowners or roofing renovations, as examples. If your ad budget is really low, like $5–$7 per day, you can try this narrow targeting to reach the right audience.
But if you’re spending $20/day or more, you don’t need to do anything extra. I recommend letting the algorithm do its job. The algorithm will test your ad for a few days and automatically figure out which type of people are more likely to convert into leads. Then, it will start showing the ad to those people.
So, if you have a good budget and want leads for your business, you can trust the algorithm to handle it. Next, you’ll see the Ad Placement option. But you don’t need to change anything here because, once again, the algorithm is here to help. It will figure everything out for you.
Facebook Ads Creation For Roofers.
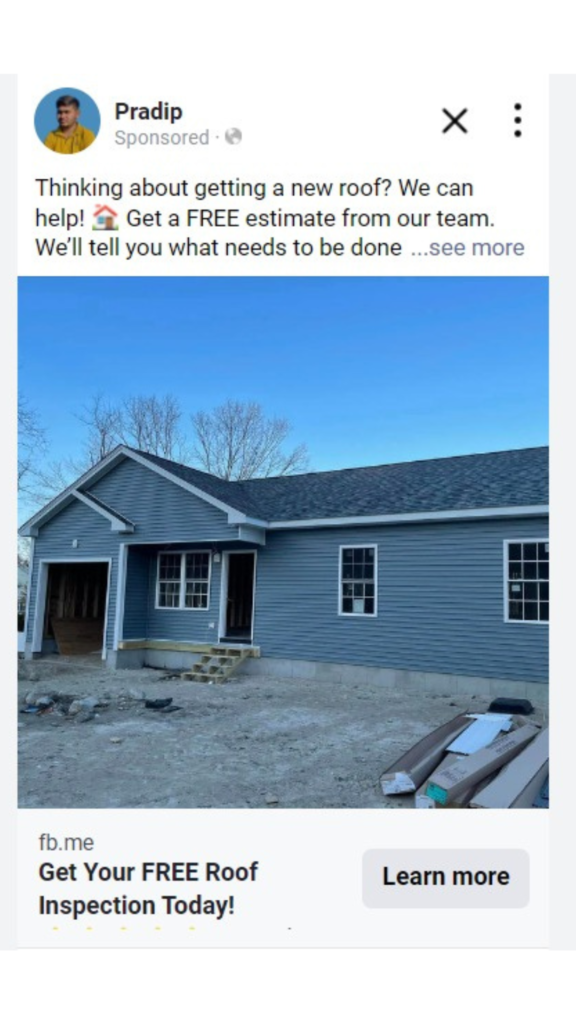
Now we’re at the final step, and this is the most important one because it will decide whether you get leads or not. In this step, you’ll upload your ad images and write your ad copy. You’ll need to make an offer in your ad that grabs people’s attention so they show interest and convert into leads.
You can hire a freelancer on Upwork or Fiverr to write ad copies for you. Writing ads with a good offer that turns people into leads can be hard, especially when you’re just starting out. For the ad images, you can use pictures of your best work without any editing. As you can see in the image above, I used a simple, high-quality image in my ad. Another great option is to use before-and-after images in your ad.
You need to fill in the Primary Text, Headline, and Description. In the Primary Text, add your main offer with a call to action. As you can see in the image above, I wrote “Thinking about getting a new roof?” You can also add the right emojis to grab people’s attention.
Now, let’s move on to the Headline. You can write something like “Get Your Free Roof Inspection Today!” as shown in the image above. I didn’t write the Description because it’s not as important as the Primary Text and Headline, but you can add something like “⭐⭐⭐⭐⭐ – 5-star rated” to make it look better.
If you have a landing page and have already linked it to your ad campaign, then everything is ready to go. You’ve successfully created your campaign! Now, you can publish your ad. Facebook will review your campaign, and after the review, your ad will go live within a couple of hours.
If you set your budget to $20/day, you can expect results in about 4-5 days. Your ad campaign will start giving you leads, and you can collect them from your landing page. But if you don’t have a landing page and want to collect leads using Instant Forms, you’ll need to create the form. Here’s how.
How to Create an Instant Form in Facebook Ads Manager?


To create a Facebook Instant Form, first, scroll down a little. You’ll see the “Instant Form” option. If you’ve never created a form before, you’ll see the “Create Form” button. If you’ve created forms in the past, you’ll see a list of your existing forms, and you can select one to use. However, most people don’t have forms yet, so we’ll create a new lead form from scratch.
Click on “Create Form,” and a new menu will open. Here are the steps: Form type ➡️ Intro ➡️ Questions ➡️ Privacy Policy ➡️ Ending. First, start with the Form Type. Select “More Volume” and click on Next.
Now, let’s move on to the “Intro” section. First, choose a background image for your form. You can use the same image you used in your ad.
Next, for the headline, you can write something like “Get Your FREE Roof Estimate!” If you have a better idea, feel free to use that instead. I’ve attached all the images above so you can see the form images. If you have any confusion, feel free to refer to them.
Next is the “Description” section. I wrote: “Get your FREE roof estimate from Tim’s Roofing! Please fill out the form…” You can write something like this. The goal is just to ask people to fill out the form.
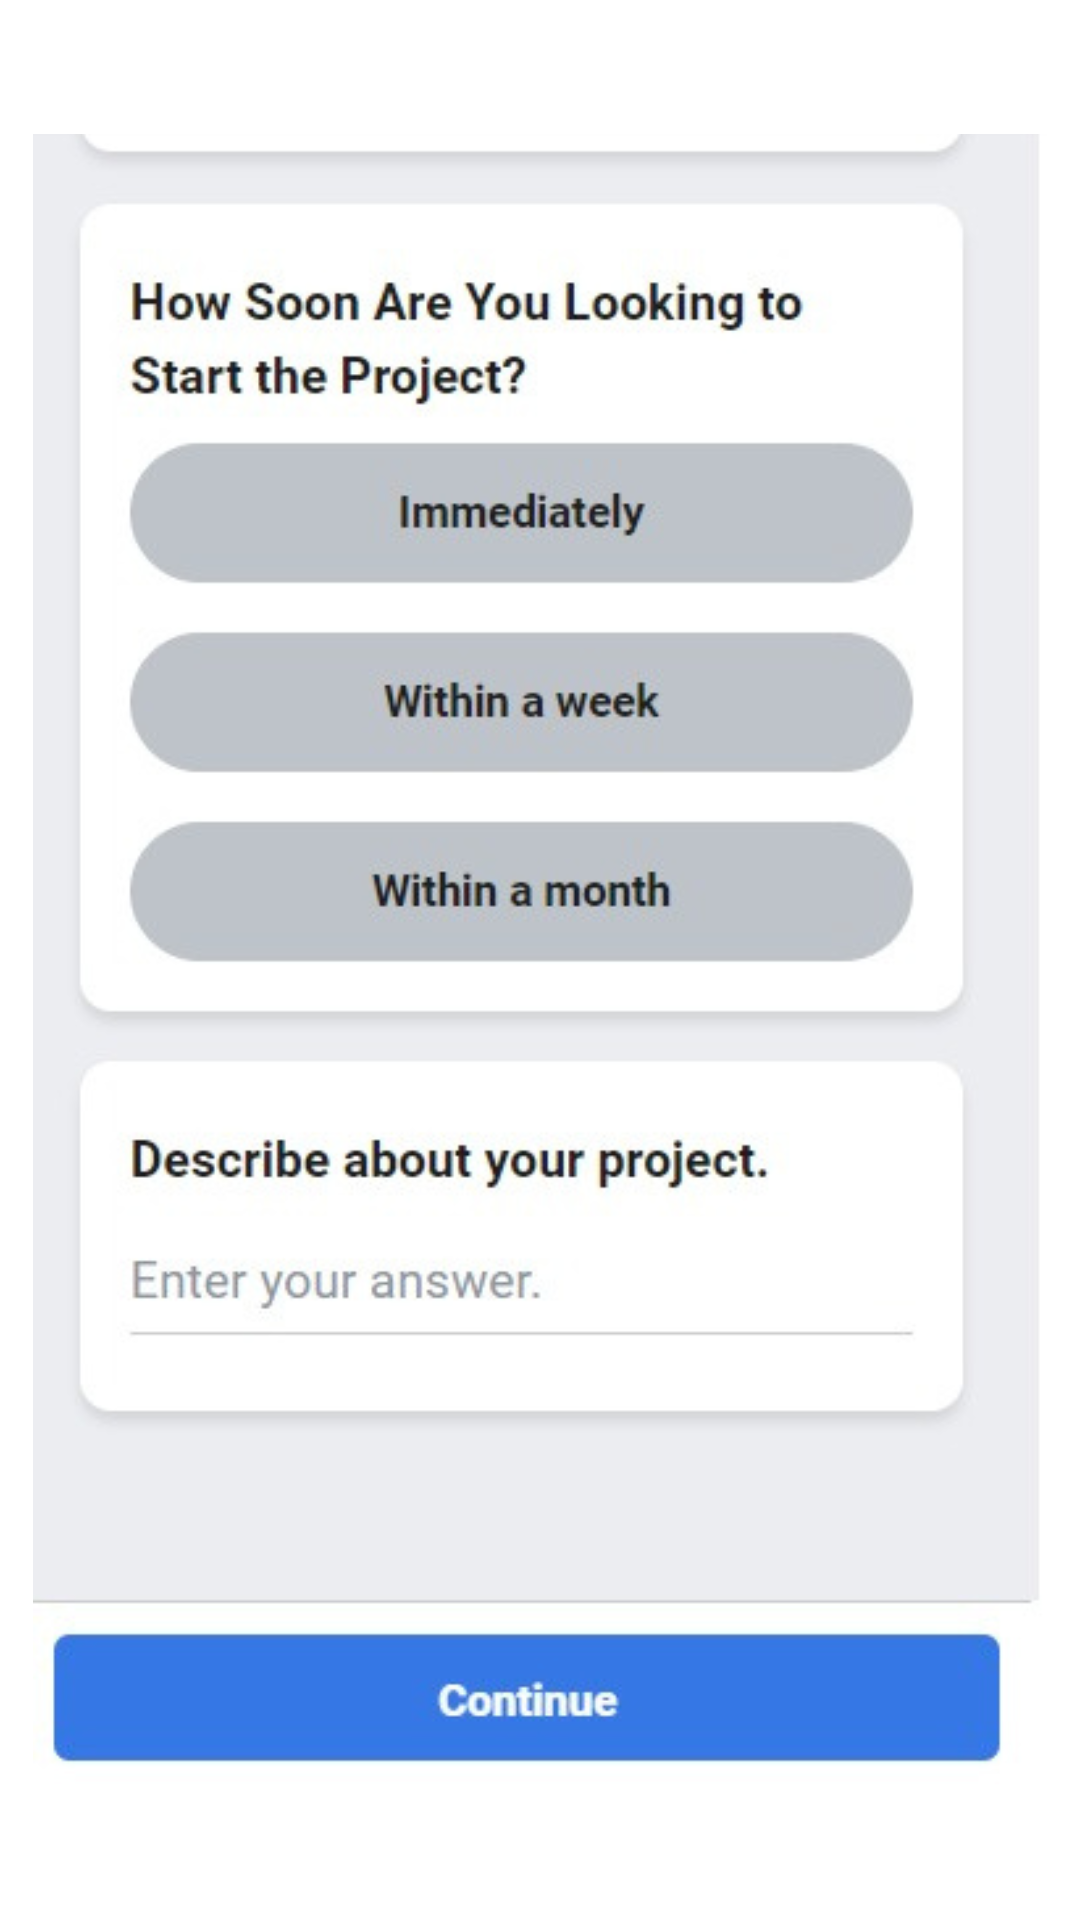
Next is the Questions section. This part is really important because the questions help you filter your leads. You can ask:
- Project details
- How soon they’re looking for the service
- Their budget
- Name
- Number
- Address
Don’t ask too many questions, though, as this can frustrate the user, and they might leave the form without completing it.
The next part is “Privacy Policy”. You can add your website’s Privacy Policy link to the form. If you don’t have a website, you can create a Privacy Policy page for free using Google Sites.
Now, the final part is the “Ending”. Here, you need to write a Headline and a Description. For the Headline, you can write something like: “Thanks, you’re all set.” For the Description, you can write something like: “Our team will contact you within 24 hours.”
Now, you have the “Additional Action” option. This lets you decide what happens after someone fills out the form. For example, if you want to redirect the person to your website, you can do that. Or, if you want them to message you on WhatsApp, you can set that up as well.
Once you’ve selected what you want, your form is complete, and you can go ahead and publish your ad. Now, you can grab yourself a juice and wait for 5-7 days. After that, you’ll start receiving leads.
How you can use AI to generate leads through Facebook Ads Manager in 2025?
Meta is improving its AI every day, and Facebook/Meta now offers some great AI features to make your work easier. These include:
- AI-Powered Audience Targeting
This helps you reach the right people by analyzing their behavior and interests. It automatically targets users who are more likely to be interested in your services. - Automated Ad Creation and Optimization
AI can create and optimize ads for you, suggesting the best images, headlines, and call-to-action phrases based on what works best. - Automated Budget Optimization
AI helps you manage your ad budget by automatically adjusting it to make sure your money is spent on the best-performing ads.
These features, along with others, make it easier to run ads and get better results without spending too much time on the details.
The problem with these features is that they’re not yet fully advanced, so they might not always deliver perfect results right away. If you want to test them, it’s a good idea to try them out in a separate ad campaign with a low budget. This way, you can see how they perform without risking too much of your budget.
I can Help You!
Hey there! I’m Pradip, a paid ads expert, and I help local businesses get more leads using Facebook Ads. I’m also diving into Google Ads, haha!
If you’ve made it this far, I’m guessing you’re a business owner looking to grow. If you want me to run your ads and help you bring in more leads, just reach out! I’d be happy to help you out. Thanks for reading!